This article runs through various troubleshooting steps to try if you are having trouble connecting to Sitebulb Server - as in, instances where you are unable to connect from your desktop machine to the server machine.
This article only relates to Sitebulb Server DIY customers - if you have a Sitebulb Cloud Server subscription, this page does not relate to you (please contact us on [email protected] if you experience any issues).
Specifically, this guide relates to situations where you are using a machine within your internal network as your server. In other words, your server machine is running in the same internal network (LAN) as your other desktop machines. This might be a spare desktop machine you have available, or hardware you have specifically bought to run as your server.
If you are renting a server for use with Sitebulb, such as AWS or Google Cloud Compute, please see our other troubleshooting guide for that.
Using the toggle in the top left, switch to your server list, which will show you all your servers and their connect status:
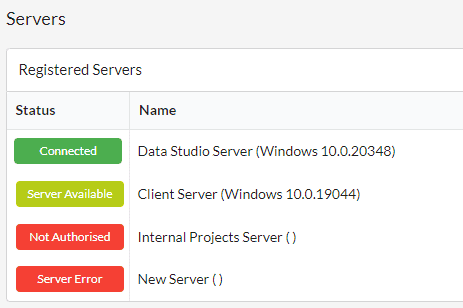
These status codes mean the following:
Of these different statuses, the one that is most complicated to solve is 'Server Error' (which will also sometimes display as 'Connection Failed'). This means that the connection cannot be established between your desktop machine and the server machine.
This could be for a number of reasons:
This article will provide troubleshooting steps for you to walk through - please check each step and don't skip ahead!
The troubleshooting diagnosis steps below relate to local machines on your network. If you are trying to connect to rented/external servers (e.g. AWS/Google Cloud), please see our other troubleshooting guide.
If you are getting 'Server Error', please work through all the troubleshooting steps below. If you are getting 'Not Authorised', please work through the troubleshooting steps below starting at #3.
Log onto your server machine, and make sure you have the latest version of Sitebulb Server installed. You must use the Sitebulb Server installer, which has a .msi extension.
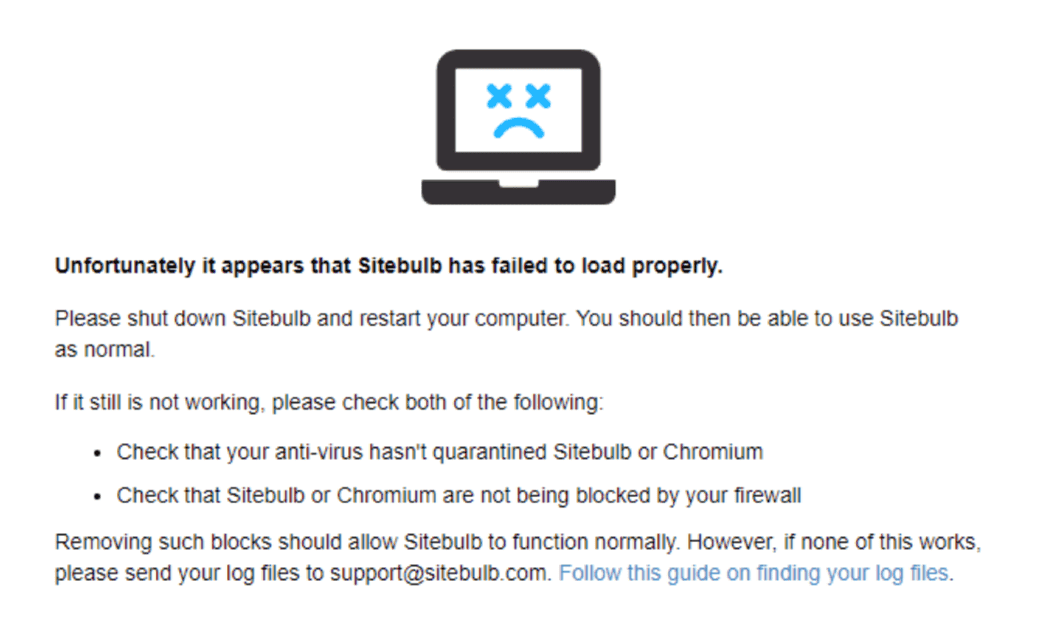
Make sure you can access Sitebulb Server to login and run audits, etc...
If it doesn't work properly, or you see the 'failed to load' screen, read on below.
Please try these two things to resolve Sitebulb Server running correctly:
If you are running Windows Home or Windows Pro you may also need to do this additional step, in order to allow incoming connections to port 10401:
Search Windows for 'Command Prompt', and select the 'Run as administrator' option:
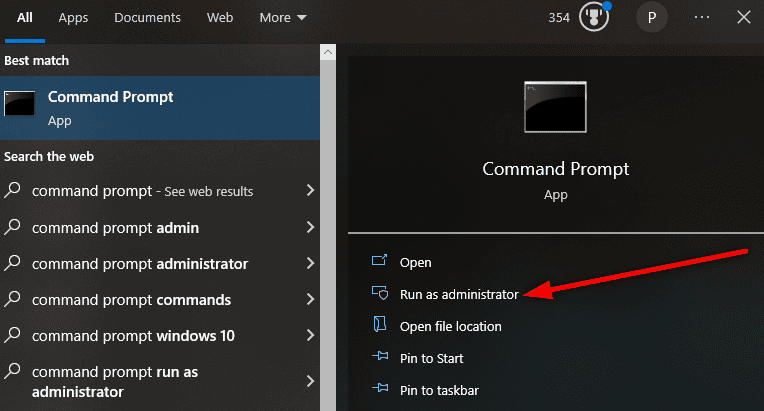
Then execute the command:

You do not need to do this if you are running a Windows Server OS.
Sitebulb Server runs as a Windows service, so it may be that the service has stopped running, and needs to be restarted.
Go to Task Manager, and navigate to the Services tab. The status column is meant to show 'Running', but may show 'Stopped' as below;
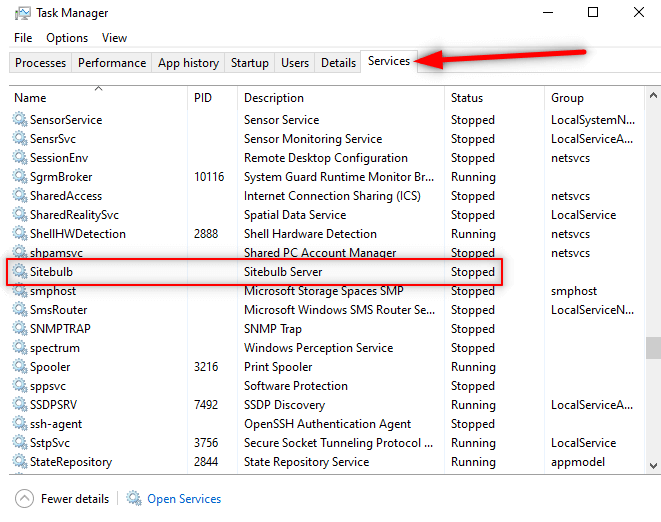
If this is the case, right click on 'Sitebulb' and click 'Start'.
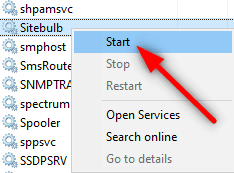
You should then see the status column change to 'Running'.
You should now be able to run Sitebulb from the desktop shortcut and login using your account details.
If you have trouble with either running or logging in to Sitebulb, please restart the machine and try again. If you are still having issues with this step, please contact us via [email protected] (i.e. don't continue the checklist below).
On the server, make sure you have added a secret key and you are copying this correctly when trying to connect.
By default, your router will assign dynamic IP addresses to all the devices on your network. This could mean that the IP address of your server machine will keep changing, so you can ensure it doesn't by assigning a fixed IP address.
You should be able to do this on your router, so look up 'DHCP IP reservation' with the name of your router, and you should be able to find it - here is an example using TP-Link. You may find that on your router they have bundled together IP reservations and port forwarding - this is not a problem as we need to do port forwarding anyway.
It is better for your router to handle IP addresses, so try and do it on the router, but if you absolutely can't then you could also do it on Windows itself.
Since your server machine is in the same network as your other desktop machine(s), you can confirm that it is accessible locally by pasting this address in your browser:
http://IP_ADDRESS_OF_MACHINE:10401/Application/GetMachineId
Make sure to use the static IP address you assigned in step #5.
You should see a long alphanumeric string, like this:

If you do, this means that your machine should be accessible locally.
On your desktop machine, add a new server and enter your credentials including secret key. For the Server Host, use the fixed IP address of your server machine (see step #5) - and make sure to keep the port as 10401.

Note: Depending on your network, this may be the only way you are able to connect to the server whilst your machine is also connected to the local network.
If you have not already set up port forwarding on your router, follow these steps to add it.
As a reminder, you need to have a port open on your network - e.g. 10501 - which forwards incoming requests to your server machine.
Sitebulb Server needs access to this machine through the open port (10501 in this example) - so your firewall must allow incoming requests to this port. Check to ensure that your firewall is open at port 10501 at all points in the network - you may have additional firewalls that are not open.
To check if port forwarding is working correctly, use this tester tool.
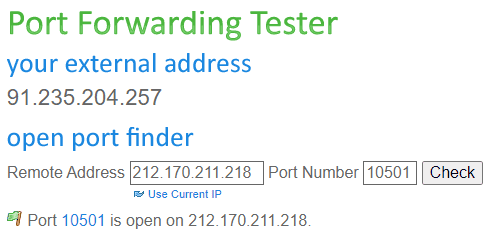
For the remote address, you need to enter the public IP address of your network, and the port number needs to be the port you have opened to use for port forwarding.
You can use this tool to confirm that this port is open and accessible externally.
Even if you can connect to your server locally (see step #7) you may still not be able to connect to it from a machine outside your network.
So you need to test this also, which you can do by accessing a different network (e.g. try from home, tether your phone, log onto a VPS etc...)
Once connected to a different network, open a browser and enter:
http://PUBLIC_IP_ADDRESS:FORWARDED_PORT/Application/GetMachineId
For the example we have been using so far, this would be:
http://212.170.211.218:10501/Application/GetMachineId
You should again see a long alphanumeric string, like this:

If you do, this means that your machine should be accessible from external networks.
For this step you need to remain on a different network to your local server machine - the same as step #9.
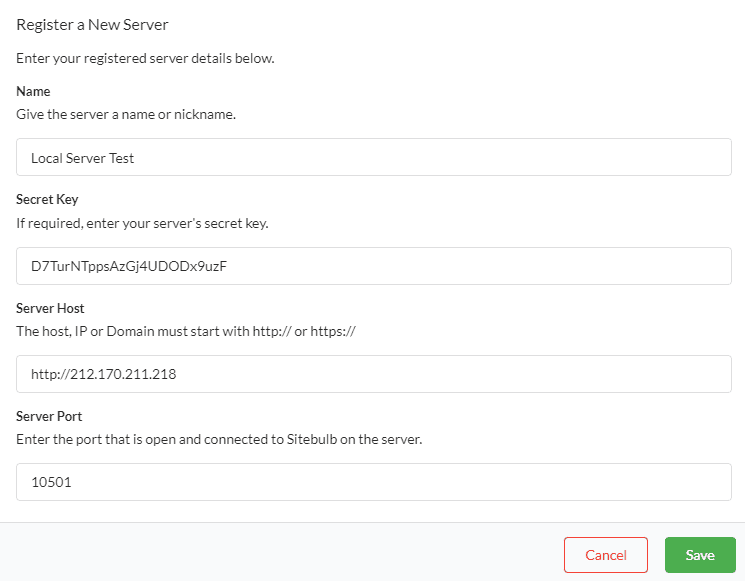
Open Sitebulb on your desktop machine and navigate to the Servers page, then add a new server with your server credentials. Ensure you are using the public IP address of your network as the host, and the forwarded port as the port number.
If you have followed all of these steps, you should be able to connect to your server both locally and externally.
However, if you are still experiencing problems, please contact [email protected] so we can clarify where it is falling down. Ideally we would like to know at which stage of this troubleshooting process you ran into trouble.